Category Archives: Food

The ugliest macaroons ever

Some of you may be familiar with my previous attempt at making macaroons, if you fancy a laugh then here is the post Macaroon mess. The other day I decided to try again, the result was, if possible, even worse than my previous attempt. Baring in mind that I had put A LOT of pink food coloring in…Here is a picture of the first batch…

Image

Needless to say that these went straight into the bin. Luckily I had enough mixture for another go so into they oven they went and this time I sat and watched them through the oven door, they swelled up beautifully but started going brown on top so I took them out and as soon as I did they collapsed. The oven temperature must have been too high. My flatmate found me in the kitchen scraping the ruined remains off of the baking sheet in an attempt to salvage something. In the end I managed to get them in a bowl and dolloped some double cream on top. Better than nothing.

One day I will succeed! One day…

Image

Image

Carrot cake muffins

Hello!

It has been a very long time, I am afraid that I have neglected my blog for the past few months. The reason being (and it is a very good reason indeed), I have become a student! This means that my blog about cooking has been suffering as I have been mostly living on pasta, bacon and Heinz baked beans and tomato soup, and I am sure that you would not be interested in learning how to heat soup up in a microwave.

I am now however the proud member of a baking club! It is a very good deal, I pay about 2 pounds a week and they provide all the ingredients, utensils, ovens, etc. It is all done in the university kitchen so it is really nice! I have done a few things there all ready like apple pie, cupcakes and gingerbread but unfortunately, did not think to share it with you. I am just on a break now after my exams so I am back in La Belle France making the most of my gas hobs, giant oven and dad’s KitchenAid that he got for Christmas, I REALLY want a KitchenAid! I will only be able to have one though sadly once I have my own flat. It is the first thing I will have in my imaginary future kitchen… One day…

Image

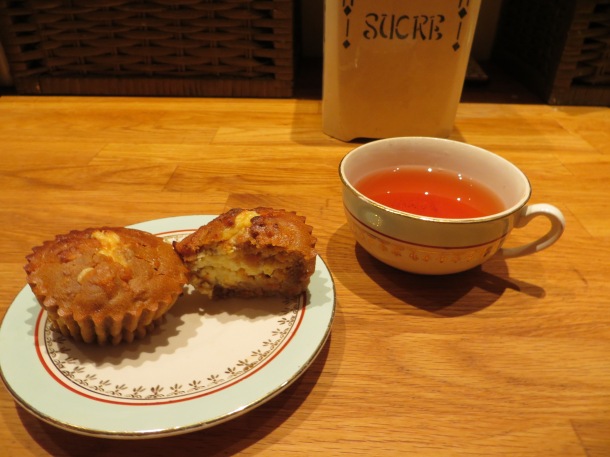
Anyway, I am going to show you a new recipe now that I found in a magazine, it is from The Great British Bake Off (for Comic Relief). Introducing Carrot cake muffins! I may have made a few hiccups along the way, for example instead of using shredded bran cereal I raided my mums cereal cupboard and used her Fruit and Fibre, I think the raisins that came with that add a nice taste but she was not very impressed. Also my ones do not look a lot like the picture they used in the magazine, because of the filling it looks like they have some odd growths on the side of them so for the sake of presentation I have selected only the finest of the batch for my photoshoot.

Carrot Cake Muffins

Ingredients

75g/ 2 1/2oz shredded bran cereal

225ml/8fl oz milk

zest of 1 medium orange

120g/4 1/4oz cream cheese

1 level tbsp caster sugar

3 large carrots

125g/4 1/2oz light brown muscovado sugar

200g/7oz self raising flour

1 level tsp baking powder

1 1/2oz level tsp of ground cinnamon

1 level tsp ground ginger

2 eggs

4 tbs sunflower oil

Recipe

1 Put the bran cereal and the milk into a big bowl, like a giant bowl of cereal, and stir it around to mix. Leave it for 15 minutes to soak. Preheat the oven to 220C/425F/gas 7.

2. Tip half of the orange zest into the big bowl of cereal, mix it and put to one side. Mix the cream cheese, caster sugar and the remaining orange zest in a smaller bowl, this is the lovely filling.

3. Peel the carrots and, using the coarse-hole side of the grater, grate onto a board. Weigh out 150g of carrot and add it to the large bowl.

4. Add the brown sugar to the big bowl and mix well with a wooden spoon. Sift in the flour, baking powder, cinnamon and ginger but avoid mixing them in for now.

5. Break the eggs into another bowl and add the oil. Beat with a fork until the egg yolks and egg whites are mixed together. Then tip it into the big bowl and mix everything together with a wooden spoon.

6. Using a medium-sized spoon, drop a dollop of the mixture into each paper muffin case in the tray. Drop a smaller spoonful of the cream cheese filling into the middle then cover the filling with more carrot mixture.

7. Place in the heated oven for 20 minutes until golden brown. Check that they are cooked by gently pressing the centre of a muffin with your finger, it should spring back when ready.

8. Remove the tray from the oven and leave for 5 minutes. Then place the muffins on a wire rack to cool. Store in an airtight container and eat within 24 hours.

Hope you like it!

Meggy x

Carrot muffins

Six-seed malted wheat, by the fabulous baker brothers

I have made some bread before, quite a long time ago, and really enjoyed it! Twisty chocolate bread. I decided to make some more the other day, although savoury this time and not covered in chocolate! My dad had made the same loaf of bread before but had put far too much seeds in which made everyone’s stomachs go slightly bad so, learning from his mistake, I endeavored to make it again myself. The result was absolutely delicious, the crust was perfect, not too hard and not too soft and the inside was nice and soft. Perfect with some butter, strawberry jam and a cup of tea.

Ingredients

560g malted wheat flour

85g mixed seeds, the baker bros use pumpkin, millet, golden linseed, sunflower, poppy and sesame. I used a packet labeled “mixed seeds” that I found in the cupboard

10g sea salt

5g dried yeast (or 10g fresh yeast)

20g rapseed/olive oil

385g tepid water

 Recipe

1. Mix all the ingredients together and turn the dough out onto the work surface, now for one of my favourite parts… the kneading!!! You have the option of using a mixture with a dough hook which does everything for you buuuuuuuuut I saw a good opportunity to get some exercise to tone up my arms and also I find that kneading dough is oddly relaxing. So knead by hand for 15mins or knead by machine (lazy!) for 10mins.

2. Once the dough is smooth and elastic, nestle it back in the bowl and cover it with cling film. Leave it in a warm place to grow twice its size or for about 1 hour.

3. By hand, shape the dough so it fits into a well-floured proving basket, or just a bread basket as I had. Cover and leave in a warm place to double in size again.

4. Heat the oven to as high as it will go, max 240C. Turn the dough onto a well floured baking tray and place it into the extremely hot oven, hot hot hot! After 10mins, take a peek and see how it’s doing, then turn the oven down to about 210C. Take it out when it’s baked and golden all over, about 20mins later. 

 Meggy x

Strawberry tart, by Tamasin Day-Lewis

First of all I would like to announce that I have acquired my french baccalaureate with a merit!!!! I am very pleased! I shall make something to celebrate but in the mean time let me show you the recipe for this lovely strawberry tart.

Image

It’s the beginning of summer now and one of the best seasonal fruits of course are strawberries, everybody loves them and they look so nice. It was a beautiful day so I decided to make a tart, pastry and all. Be warned, this takes quite a long time to make, something I overlooked in my cooking frenzy. Overall it was nice, I have had better but I was still so proud of it because I made it.

Serves about 8 people

Ingredients

For the pate sucrée

30cm/12 inch tart tin

180g/6oz white flour

90g/3oz unsalted butter

2 dessertspoons of icing sugar

2 egg yolks

some cold water

For the strawberry filling

1 kg/2lb strawberries

4 tbsp redcurrant jelly

For the creme patisiere

375ml/13fl oz Jersey or full fat milk

1 vanilla pod, split (or  just used vanilla essence)

4 egg yolks

120g/4oz caster sugar

50g/just under 2oz cornflour

Recipe

1. First of all you need to make the pastry. Sift the flour into a food processor and cut the cold butter into small pieces on top of it. Process for about 20 – 30 seconds, then add the tablespoon of icing sugar and the egg yolks. If the paste is crumbly add a little bit of water. When the mixture has turned into a single ball, wrap it in clingfilm and put it in the fridge for at least an hour.

2. When the chilling is done, cover your work surface with some flour and get rolling! Once the pastry is rolled to your satisfaction, lie it in a greased tin, leave it in the fridge for at least 30 mins.

3. To bake blind the pastry, preheat the oven to 200°C/400°F/Gas 6. Place some greaseproof paper over the pastry and pour on the dried beans.cook for 10 – 15 mins, remove the beans, and return it to the oven for another 10 – 15 mins until golden and cooked. Leave to cool.

4. For the crème pâtissèire scald the milk, with the vanilla pod and it’s scraped out seeds.

5. Whisk the egg yolks, sugar and cornflour together in a bowl, then pour the hot milk on them and continue whisking.

6. Remove the vanilla pod and return the mixture to the saucepan, stir over a gentle heat until thickened. Turn into a bowl and cool, whisking every so often.

7. When cold, scrape into the pastry case with a rubber spatula. Turn the tart out onto a plate/bread board.

8. Now for the main, and most delicious, ingredient! Hull the strawberries and, starting at the edge of the tart, stick them upright in the crème pâtissière in a circle and work your way in, the strawberries getting smaller and smaller as you go.

9. Melt the redcurrant jelly with a tablespoon of water, then brush it liberally over the strawberries and the custardy gaps.

Voilà! Le strawberry tart!

Image

Image

Meggy x

English scones, by Delia Smith

Even though I have been living in France for 7 years I still crave english food ! I can’t stand going through the day without a cup of tea and when I visit my home country I HAVE to have double cream with every dessert as well as visiting my favourite restaurants, especially chinese restaurants, which aren’t english but my favourite chinese dish (crispy duck pancakes) IS NOT SERVED in France ! I think that if you own a chinese restaurant it should be law to serve crispy duck ! Anyway enough about crispy duck, this post is about scones, which are an english treat sorely missed in our household. We have managed to get our hands on some clotted cream and I decided to make some scones to go with it.

These are SO easy to make and I will definitely make some more ! Unfortunately I wasted half a scone by trying out a topping variation called “thunder and lightning” which is clotted cream and treacle, honey or golden syrup…

I used Black treacle which… I did not like at all, however, the golden syrup one was gorgeous ! Despite my untidy presentation !

Here’s how to make this gorgeous, english tea-time snack.

Ingredients

225g of self-raising flour

40g of butter, at room temperature

1 1/2 tablespoons of caster sugar

a pinch of salt

150 ml milk

a bit of extra flour

Recipe

1. Preheat the oven to 220 C/gas mark 7/425 F and grease a baking sheet.

2. Sift the flour into a bowl and rub the butter into it rapidly, using your fingertips.

3. Stir in the sugar and salt, then take a knife and use it to mix in the milk, little by little.

4. Flour your hands and knead the mixture to a soft dough, if it feels dry add some more milk. Turn the dough out onto a floured board and roll it out until it is about 2 cm (3/4 inch) thick. Take a 1 1/2 or 2 inch (4 or 5 cm) pastry cutter (I used a glass because we don’t have any !), place it on the dough and then tap it sharply so that it goes straight into the dough, don’t twist it unless you want funny shaped scones.

5. When you’ve cut as many scone shapes as possible out of the dough place the scones on a greased baking sheet, dust each one with some extra flour and bake near the top of the oven for 10 – 15 minutes.

6. Cool on a wire rack and eat them as fresh as possible!

Meggy x

My mum’s tuna bean bake, perfect student food

My boyfriend is a student living in a tiny studio apartment by himself. He likes his food but can’t be asked to cook so when I go to see him I like to cook some decent meals for him, to get him off the pasta diet. This backfired once when he said he was going to make dinner for a change and decided to make a curry… He boiled some milk in a pan, added curry powder, some rice and chicken. This was his homemade chicken korma. I don’t think that I have to tell you that it was not the best thing I have ever tasted, unfortunately he liked it and declared that he would take charge of the savoury stuff and I’d do the sweet things. Luckily, he seems to have forgotten about that and let me cook on my last visit. Once I had gotten over the pile of mouldy plates piled in the sink (ewwwwwww!!!) I took charge of the kitchen and made my mum’s lovely bean and tuna bake dish. I decided to make it because it’s nice and cheap, easy and does not require an oven, which my boyfriend does not have in his studio.

Ingredients

a tin of white haricot beans

a tin of canned tomatoes

a can of tuna

an onion

grated cheese

whatever takes your fancy to spice it up a bit !

Recipe

1. Cut the onion up into small chunks and fry them in a big pan.

2. Add the can of tomatoes and then can of tuna, aswell as anything else you might want to use.

3. Add the white haricot beans.

4. add the grated cheese and VOILA my mum’s tuna bean bake ! Yummy !

I am not going to put a photo on because, although this may be delicious it is unfortunately, not pretty.

Meggy x

Banana, cherry and white-chocolate cupcakes/muffins, by Nigella Lawson

First of all, sorry I haven’t put a post on for a while, I’ve been very busy what with some exams coming up. I eventually found the time to make these lovely cupcakes, there was a discussion as to whether they are cupcakes or muffins. I think they are a cross, cuffins if you like ! These were so easy to make, and yet so delicious. They taste so much of banana and then occasionally you get a lovely burst of white chocolate or cherry in your mouth! I think that cranberries would be good instead of the cherries too.

Ingredients

125g unsalted butter

200g cater sugar

1 tsp vanilla extract

3 ripe bananas

60ml (4 tbls) sour cram

2 large eggs

1 tsp bicarbonate of soda

1/2 tsp baking powder

300g plain flour

40g dried cherries, chopped

50g white chocolate, chopped, or buttons

12-bun muffin tin with paper cases (although, I managed to get a good 18 out of the mixture)

Recipe

1. Preheat the oven to 180 C/gas mark 4.

2. Melt the butter in a large saucepan, then, off the heat, add the sugar, vanilla and soft bananas, mashing them with a fork in the pan (or before they go in the pan). Stir in the sour cram and the eggs and, still using your fork or wooden spoon, beat to mix. Add the bicarb and the baking powder, and stir it in as well, finally stir in the flour, cherries and chocolate.

3. When the mixture’s just blended, divide between the 12 muffin cases and cook for 20 minutes or until golden and springy on top. Remove the cupcakes in their papers to a wire rack and leave to cool.

Meggy x

Twisty chocolate bread, by Jamie Oliver

I have never made bread before, despite watching The fabulous Baker Brothers and Lorraine Pascale, and the other day I just thought why not ? I found a recipe in Jamie Oliver’s The return of the naked chef and it was brilliant! I mixed the yeast with the water and was fascinated when I came back to it a few minutes later and it was all frothy and then when I mixed the yeast with the flour it was like fluffing a cushion up! I was so excited when I left the bread to prove and it grew to twice the size! I felt bad rolling it out to make my bread, especially as my dad kept saying “it’s alive you know! that’s why it’s bigger!” that just made me feel guilty.  I also spent about 40 minutes cracking hazelnuts to put in the bread because we didn’t have any ready ones. Remember to buy them already shelled everyone, it’s a huge time saver.

This bread was so gorgeous, we made it at night and then cooked it in the morning and had it for breakfast like croissant, yummy yummy! If you think making bread is a pain in the neck give this a try, I found it so fun and I will definitely be making more bread in the future!

Ingredients

30 g fresh yeast/3 x 7g sachets of dried yeast

30 g honey (or sugar)

625 ml/just over 1 pint of tepid water

1 kg/just over 2lb strong bread flour

30 g/1 oz salt

extra flour for dusting

200 g soft butter

200 g hazelnuts, lightly roasted and crushed or broken up

310 g/11 oz chocolate (70 % cocoa) smashed up or grated

Recipe

Preheat the oven to 200 C/400 F/gas mark 6

1. Dissolve the yeast and honey (or sugar) in half the tepid water.

2. On a clean surface or in a large bowl, make a pile of the flour and salt. Make a well in the centre and pour in the dissolved yeast mixture. With 4 fingers of one hand, make circular movements from the centre moving outwards, slowly bringing in more and more of the flour until the yeast mixture is soaked up. Pour the other half of the tepid water into the centre and incorporate all of the flour to make a moist dough.

3. Knead the dough (which was so fun) for 5 minutes.

4. Flour your hands and the top of the dough, make it into a round shape and place on a baking tray. Deeply score the dough with a knife and leave to prove until it’s doubled in size. You should leave it in a warm, moist, drought-free place for it to prove quicker. This should take about 40 minutes.

5. Divide the dough into equal parts. Prove for a second tile and then take each piece of dough and push out into a square shape on the floured board. The roll out to about 17 cm/7 inches wide. At this point, roll the other way and keep rolling to achieve a rectangle about 0.5 cm/1/4 inches thick. Using a knife, spread the butter thinly across the dough. Sprinkle tha hazelnuts and the chocolate over and roll up across the width like a swiss roll. Cut across into 2 cm/1 inch wide slices. Place the slices next to each other on a greased baking tray, cut side upwards, with small gaps in between. Bake in the preheated oven for 20 minutes. Allow to cool for 20 minutes before mmmmmmming at it’s tastiness.

I reheated one of these for breakfast the next day and it was still gorgeous.

Meggy x

A romantic night in

Valentine’s day was finally here for Moi and my boyfriend Gabriel, we decided to postpone Valentine’s day as he was still at school last week. I prepared my meal in my head again and again and hoped everything would go well… and it did! We had a lovely evening! The first course was roasted gnocci, the second course was a fabulous cornish pasty pie and the dessert was chocolate fondu (not really a proper dessert, I agree, but I don’t think we’d have been able to fit anything else in. Then we watched When Harry met Sally, which Gabriel was quite skeptical about at first because it’s a “girly film” but then he was laughing more than me when we watched it. The recipes that I used are a mix of Nigella Lawson, Delia Smith and me !

Rapid Roastini (or roasted gnocci), by Nigella Lawson

Serves 2

Ingredients

2 x 15 ml of regular olive oil

250 g of gnocci

Recipe

There are two ways to do this: you can either heat the oil in a large frying pan, put the gnocci in and fry for 4 minutes, turn them around and fry for another four minutes, OR you can bake them by preheating the oven to 200 C/gas mark 6, putting the gnocci in a roasting pan, add the oil and then bake for 20 minutes, stirring them after 10 minutes.

Voila, that’s it, simple!

Cornish pasty pie, by Delia Smith

Serves 6 people

I changed the ingredients a bit to make my pie as I didn’t have everything, I replaced the potato and turnip with 3 carrots. 

Ingredients

For the pastry

350 g plain flour

175 g lard

salt and pepper

cold water, to mix

For the filling

575 g chuck steak

1 large onion

1 medium to large potato

1 medium to large turnip

1 level tsp mixed herbs

To glaze

1 beaten egg

Recipe

1. Preheat the oven to 200 C/ gas mark 6 and grease a 10 inch (25.5) metal quiche tin.

2. Make the pastry first by cutting the lard up into small chunks and rubbing it into the flour, when the fat has been distributed evenly add the salt and pepper and some water to make it all stick together and make a ball. Stick it in the fridge while you prepare the filling.

3. Slice the steak into very thin strips, about 5cm long. Place the meat in a mixing bowl with the chopped vegetables, if you have used any thick vegetables, like potatoes or turnips, slice these as thinly as possible.

4. Roll out half the pastry, large enough to line the tin with 1/2 inch overlapping. Then layer the filling ingredients in it (or just pour it in like me). Season with salt and pepper and a sprinkling of herbs and finally sprinkle in a tablespoon of water.

5. Roll out the other half of the pastry and fit it on top of the pie. Seal the edges and make a steam-hole in the centre. Go round the edge with a knife which will give you lots of excess pastry to decorate the pie with. When your done, brush the surface with the beaten egg and then bake it in the oven on a high shelf for 15 minutes. Then, turn the heat down to 180 C/gas mark 4 and continue to cook on the centre shelf for 1  1/2 hours.

This is still good cold so don’t throw it away!

Chocolate fondu

Chocolate, melt, marshmallow, yummy!

Meggy x

Toffee caramel popcorn, by Lorraine Pascale

Me and my boyfriend (well me) decided to do a Disney night where we would watch our favourite Disney films. Unfortunately we couldn’t find all of them, the attic is a dark and scary place, so we made do with the ones that were within our reach: Snow White, Lady and the Tramp (one of my favourites), Fantasia (my boyfriend’s favourite, I was alright for the first 30 mins until I looked at the back of the DVD and saw how long the entire thing was) and Beauty and the Beast. What goes better with films than popcorn? I stumbled upon this recipe when I was flicking through Lorraine Pascale’s “Home cooking made easy” recipe book and thought it sounded fun and simple, which it is.

This is toffee caramel flavoured popcorn! YUMMY! Unfortunately we couldn’t fit it all in but you can store it for 2 days so we made it last.

Ingredients

1 tbsp sunflower oil

100 g popcorn kernels

100 g soft light brown sugar

100 g butter

150 g maple/golden syrup

Recipe

1. Heat the oil in a large pan over a medium high heat then add the popcorn kernels and give the pan a shake to coat in the oil.

2. Put the lid on and every 20 seconds or so shake the pan, when you hear the first pop shake more often. Turn the heat down when the strangely fun popping begins and enjoy yourself by watching the mini firework display (if you have a see-through lid of course). Keep shaking it every so often until only a few pops can be heard, take it off the heat and leave to stand for a minute or so, then take off the lid and leave the popcorn to cool.

3. While the popcorn is cooling, heat the butter, maple/golden syrup and sugar in a small pan over a low heat. Simmer for 2 –  3 minutes, stirring from time to time. Take the pan off the heat when the mixture is syrupy and smooth.

4. Pour half of the sauce over the popcorn, mix it around with a couple of wooden spoons until the popcorn is covered and then pour the remaining half in, again mixing it all around until the popcorn is covered.

5. Let the popcorn cool right down before you eat it, otherwise things will get seriously sticky.

6. If, like me, you didn’t manage to finish it all you can put it in an airtight container for up to 2 days.

Meggy x